


Description
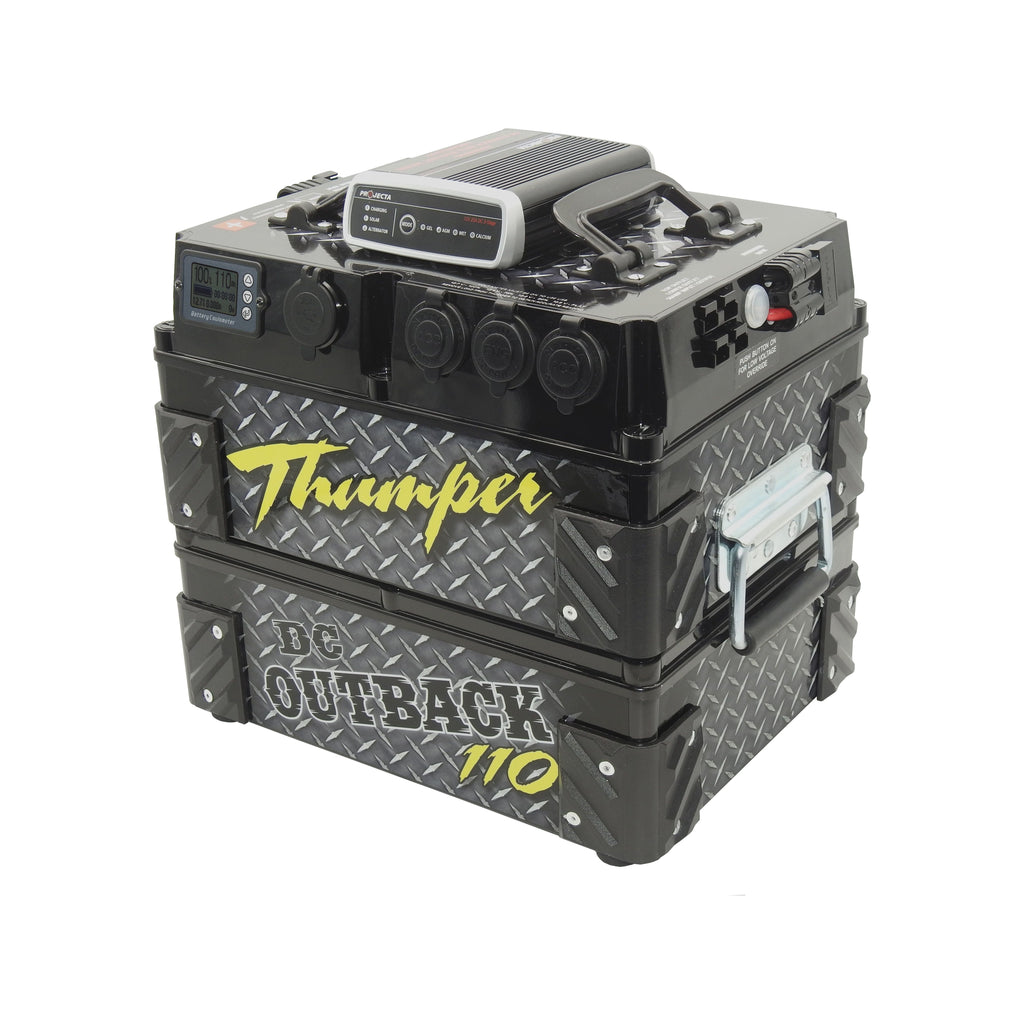
Available in two sizes (80 AH and 110 AH), the Thumper Outback DC incorporates the use of a sophisticated DC charger for both vehicle and solar charge.
The Thumper Outback DC unit is fitted with the option of either the Redarc BCDC1225D or Projecta IDC25.
- Battery Voltage
- Remaining Battery capacity (Amp Hour capacity)
- Remaining run time at current load / remaining time left to recharge
- Discharge / or / recharge load in Amp reading
- Discharge / or / recharge load in Watt reading

KEY FEATURES
|
Use of an sophisticated DC charger (hardwired to battery connection) |
Increased length of jumper leads - now provided at 1.8mt |
| In built MPPT Regulator compatible with unregulated solar panels via the |
Vehicle wiring loom included with voltage over-ride to suit new model vehicles |
| Compatible with charging from 12 volt or 24 Volt vehicle (input voltage 9 - 33v) | Multiple outlet sockets, including Cigarette sockets, Merit, Anderson and USB |
| Easy movement between multiple vehicles |
Bluetooth monitoring device installed |
The new range of Thumper Outback DC units unit are fitted with the latest technology in DC charging; The Projecta IDC25 (V5). This particular DC charger is designed to allow for an optimal input charge to be harnessed from the use of both newer and older model vehicles as well as unregulated 12 volt solar panels.
As the input charge to the DC allows for voltages between 9-32Volts, the Thumper Outback DC is now compatible to charge from 24 volt vehicles!
The IDC25 unit offers a MPPT Solar Regulator rated to 25 Amps. The regulator has been hardwired into your Thumper Outback DC unit via an independent 50 Amp Anderson connector labelled ‘Unregulated solar input’. This outlet has been designed solely for the use of an unregulated solar panel (approx. input capacity 400-450 watts).
The DC charger will act as the battery isolator to separate the vehicle main battery from the Thumper Outback when the ignition is OFF.
This will reserve the main start battery for the sole purpose of starting the vehicle.
The Outback has two methods of isolation:
- Normal operation (DC charger to act as isolator)
- Over-ride option for low voltage vehicles.
When left to operate normally (over-ride switch not engaged), the DC charger will act as the in-vehicle battery isolator. This component will isolate the Thumper pack from the vehicle's starter battery when your vehicle’s charging voltage falls below 12.7 volts. This function acts to protect the main start battery from discharge.
If left to operate normally, the DC charger will act as voltage sensitive. Voltage sensitive operation will require the start battery to reach and maintain 13.2 volts for approx 90 seconds in order to engage the DC charger and allow for charge to begin.
If the vehicle’s output voltage falls below 12.7 volts, or fails to hold 13.2 volts on start, then the 'over-ride' button on the Thumper must be used. This 'over-ride button' acts to over-ride the voltage required to engage the DC charger, allowing it to start charging at a lower voltage.
When using the 'over-ride', the isolator function in the DC becomes void (will not operate). If no isolator is installed in the vehicle when the over-ride is in use, it can result in discharging the main starter battery.
To overcome this issue, Thumper have provided a complete vehicle wiring loom (TUR-L) with every purchase of the Thumper Outback battery packs.
Simply install the TUR-L (provided) in the vehicle (suits all make and model vehicles) to allow the use of the 'over-ride' without the fear of discharging the starter battery.
In order to over-ride any low voltage issues, Thumper has equipped the Outback battery pack with a low voltage 'over-ride' switch.
The 'over-ride' switch is designed to work in conjunction with the DC charger and TUR-L (provided) to allow the DC charger to work as 'ignition activated' when needed.
 |
SWITCH IN ON POSITION: When 'ON' the ignition switch will illuminate BLUE and will act to immediately engage the DC charger. The DC charger will cease to operate as an ISOLATOR when the 'over-ride is ON and the vehicle's ignition is OFF Note: The TUR-L must be fitted to the vehicle as the Relay mount in this kit will act as the isolator required to separate the Thumper from the main vehicle battery. |
SWITCH IN OFF POSITION: When the 'over-ride' is 'OFF', the DC charger will operate as normal ('voltage sensitive').
The DC charger requires a minimum voltage of 13.2 volts from the main start battery in order to engage charging. When the main vehicle battery falls below 12.7 volts (indicating vehicle is no longer charging), then the DC charger will act to isolate the Thumper Outback from the vehicle's starter battery.
The 'over-ride' switch will illuminate BLUE when activated. At this stage the ISOLATOR will not operate in the DC Charger.
The 'over-ride' will have no illumination when OFF. The DC charger will operate as Voltage sensitive.
The Thumper Outback DC is fitted internally with a Bluetooth monitoring device. This exciting new component of the Thumper unit allows the user to monitor the Thumper’s stage of charge via a FREE downloadable app (available from the iTunes or google play store).
The Bluetooth battery monitoring app has been designed around the parameters of a fridge operating voltages.
The Bluetooth monitoring app provides a number of different parameters that the user may choose to monitor, from vehicle input charge, voltage history graph (the information will remain stored in the Bluetooth app for a period of 35 days), cranking tests and more.
|
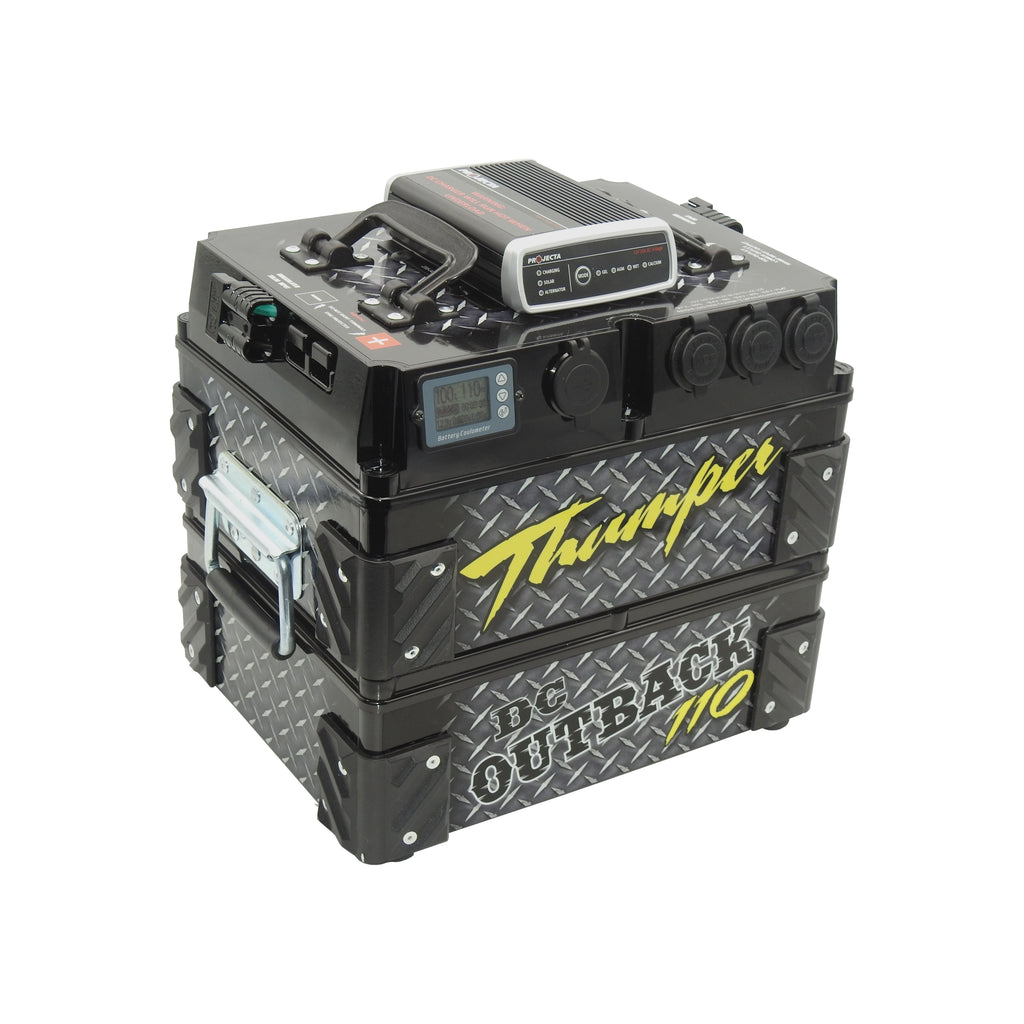
3 x Cigarette sockets
1 x Merit type socket 1 x Dual USB socket 1 x 50Amp Anderson for Solar input 1 x 50Amp Anderson for Alternator input |
1 x Engel Fridge socket
1 x Comprehensive Digital display screen 1 x 175 Amp Anderson 2 x 50Amp Inlet / Outlet Anderson connector (wired bi-directional) |
|
Part No.
Capacity: Dimensions (L x W x H) Weight: DC Charge size Warranty: |
OB110DC
110 AH 330 x 265 x 340mm 32kg IDC25 (25 Amp) 2 years |
R.R.P $ 1,199.00
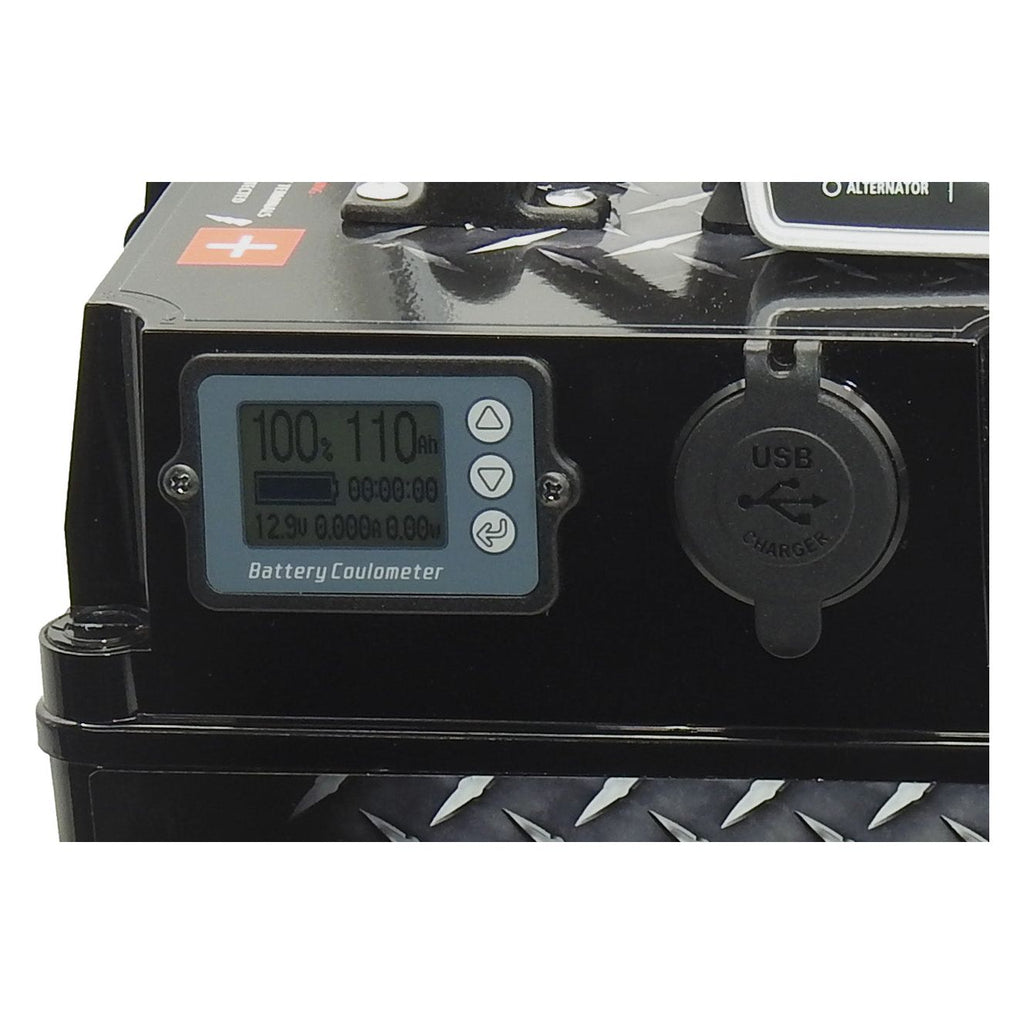
LCD Digital screen - explained:
The state of charge of your Thumper battery can be monitored by use of the LCD digital screen. The screen will remain active at all times, however, it will only illuminate green when the pack is in discharging (see below).
The screen will provide a reading of remaining percentage, AH capacity and battery voltage.
When no load is connected to the pack, all other readings will be zero.
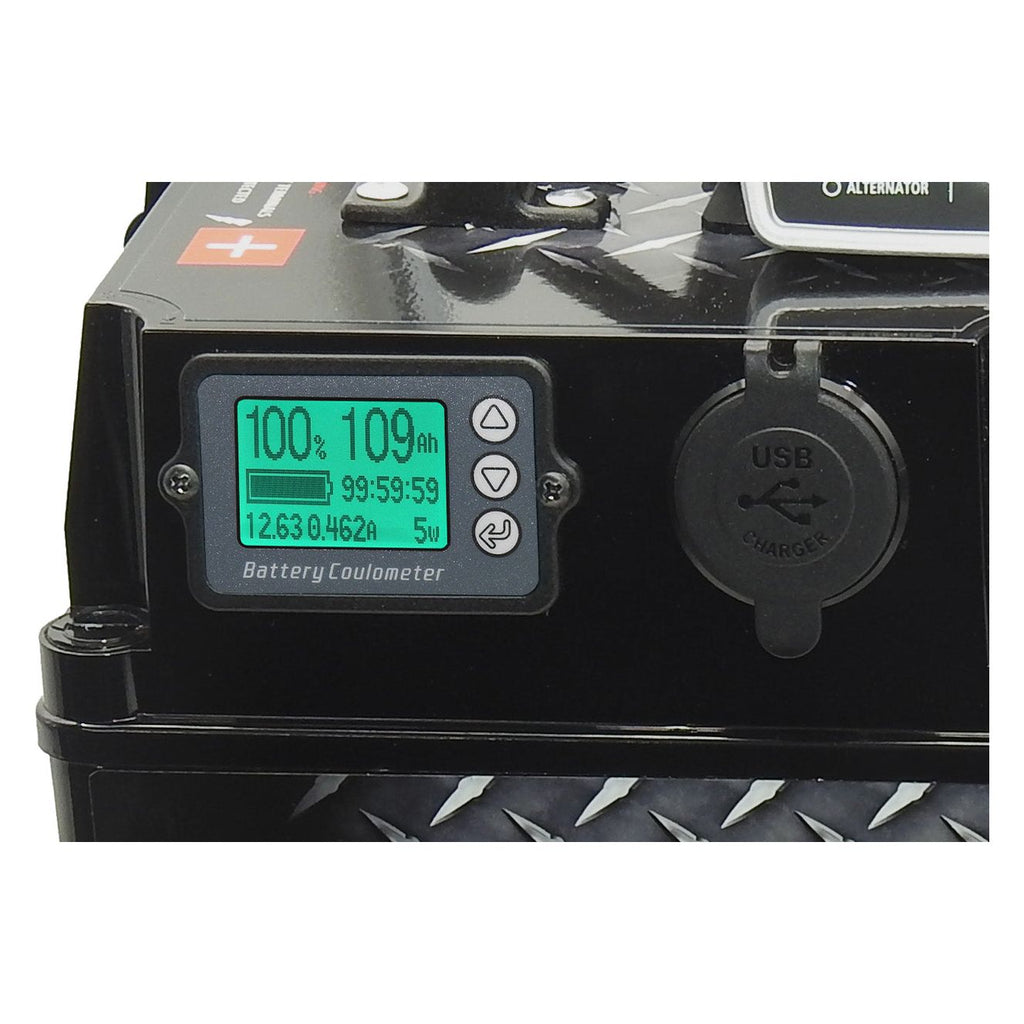
Discharging:
The screen will illuminate when there is a discharge load on the battery.
The screen will provide the remaining Amp Hour capacity, current load in both Amps and Watts and the remaining run time under the current load.

Note: When running an appliance with a load that is not constant, such as a compressor fridge, the gauge will provide a reading on remaining run time based at a continuous discharge load and will not take into consideration the cycling on the compressor. Please use this as a guide only.
The screen cease to illuminate only when all loads have been disconnected.
Charging:
The LCD screen will FLASH when charging from any source, including the vehicle, 240 volt or solar. The screen will cease flashing only once the battery is 100% charged. The screen will read the remaining Amp Hours, time remaining until fully charged and also the input charge current in both Watts and Amps.

If the pack is charging and discharging simultaneously, then the LCD screen will show the difference between the input and output current.
The screen will act to calculate either the time remaining for discharging or the time remaining to charge (dependent on whether the input or output current is greater).
If the input charge is greater, the screen will flash to show charging.
If the output current is greater, the screen will remain illuminated.
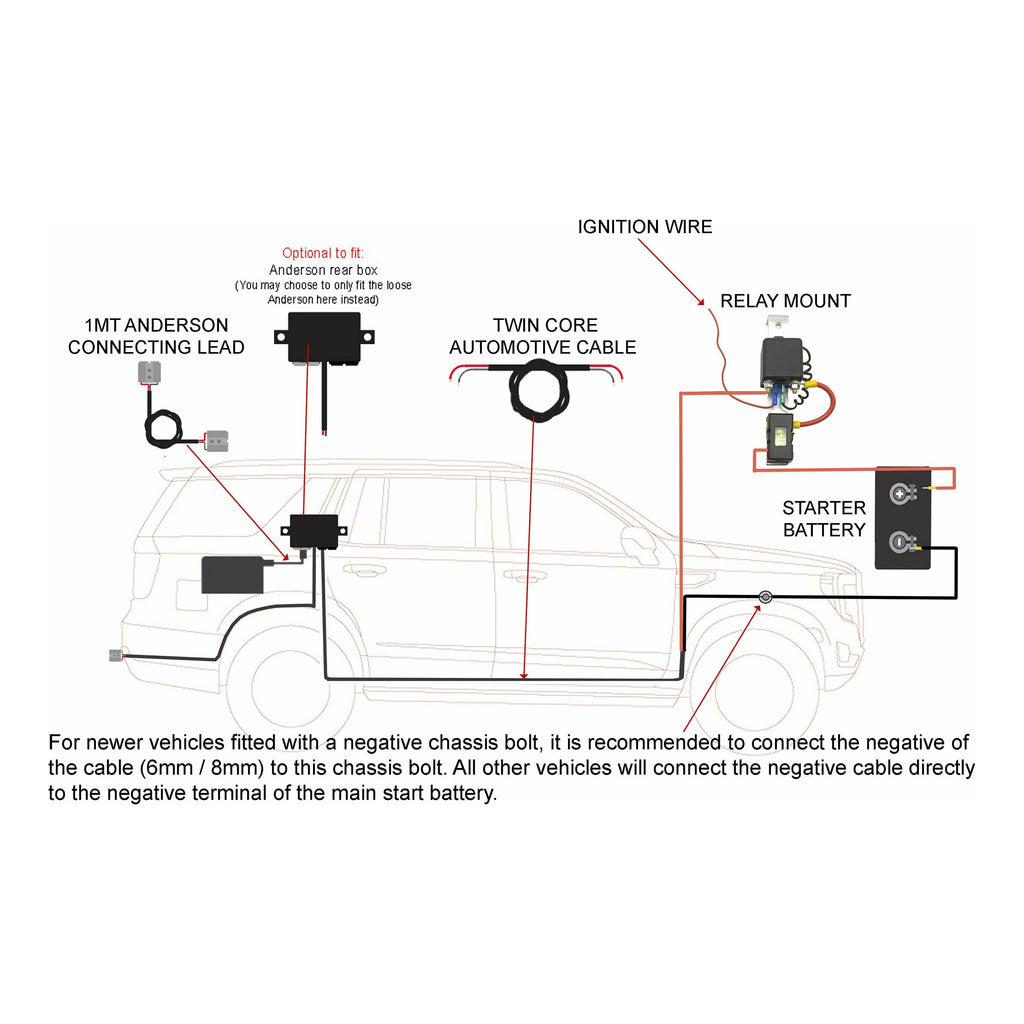
The Wiring Loom
TUR-L image: (Kit Provided)

The Thumper Universal Relay Loom (TUR-L) has been designed to suit all model vehicles, both new and old. This charging system is also compatible for vehicles that are using a DC charger (whether mounted on a battery box, in line or under bonnet).
The TUR-L been designed to fit under the bonnet of the vehicle. The kit provides an isolated HEAVY DUTY charging line to the rear of the vehicle so the user can charge secondary battery systems, fridges and other accessories.
The TUR-L uses an ignition activated relay. The relay will act to provide power to the charging system when the vehicle is running, and in turn, will isolate away from the main starter battery once the vehicle's ignition has been switched OFF.
Included with all components you will need for the vehicle installation, this charging system is provided with 8mm twin core cable (75 Amp rating).
__________________________________________________
I have a DC Charger:
Why would I fit a ignition activated relay when I have a DC charger that acts as an isolator anyway?
Great question! The answer is:
Most DC Battery chargers will act as an isolator. An isolator will separate the charge line from the main starter battery once the voltage of the main battery falls below 12.7V (indicating the ignition has been switched off) - this is what we call 'voltage sensitive'.
DC chargers require approx 13.2 Volts at the vehicle's main start battery in order to 'engage' and begin to offer charge to the system. If the vehicle has a voltage in excess of 13.2-13.5 Volts, then the DC charger will operate perfectly, acting as the isolator, and no modification to the system will be required.
If however, the vehicle's voltage drops below 13.2 Volts when driving (as many new model vehicle's do), then many times, the DC charger will disconnected and will no longer offer charge to the system. If this is the case, then the only option is to 'over-ride' the voltage activation/disconnect component of the DC charger. This is easily done by connecting the 'over-ride' wire on your DC charger.
However, when you OVERRIDE the voltage on the DC charger, you also OVERRIDE the isolator component of the charger. This basically means that the DC charger will continue to drain from the main starter battery even once the vehicle's ignition has been switch off.
This is where the TUR-L will come into play.
Simply fit the TUR-L and this system will act as your isolator to ensure that your main battery is protected and will not be drained at any stage after your ignition is OFF.
_______________________________________________
Components:
- 1 x Relay Mount (Fitted with Relay / Midi Fuse Holder / MIDI Fuse)
- 1 x 6mt length 6mm twin core automotive cable (optional 8mm upgrade)
- 1 x Anderson rear box (optional to fit)
- 1 x Anderson to Anderson 1mt connecting cable
- 2 x Pk5 small zip-ties
- 3 x Fuse-Tap options (Mico Fuse / Micro2 Fuse / Mini Fuse)
- Assortment of lugs / cable joiners / screws
Instructions for Fitting:
- Mount the Anderson rear box in the rear of the vehicle, within 1 metre of where the Thumper will be located.
- Run the twin core automotive cable (6mm) under the carpet or kick panel from the engine bay to the location of the rear Anderson box. (If the cable has been upgraded to 8mm, then it is recommended to run the cable under the body of the vehicle and secure within split conduit).
- Using the yellow crimp joiners, connect the Anderson rear box to the twin core cable by crimping both the positive and negative cable into the yellow crimp joiners. Using electrical tape, tape the crimp joiners / cable join for added protection (optional).
- Fasten the Relay Mount under the vehicle bonnet as close to the main starter battery as possible (within 600mm) - see notes on the fitting the Relay Mount in the above diagram.
- Using the lugs provided, connect the length of 6mm (or 8mm) cable to the following:
- The positive (RED) cable will connect to the remaining ring terminal on the Relay Mount (see image above)
- The negative (BLACK) cable will connect either directly to the negative terminal of the starter battery, or, to the chassis bolt (a chassis bolt may not be fitted to all vehicles) - see notes in image above for more information.
- Connect the positive cable from the Relay Mount (the RED cable with split conduit) directly to the positive terminal of the starter battery.
- The remaining thin RED wire on the Relay Mount must connect to an ignition activated power source. An ignition activated source is a positive connection that is live ONLY with the vehicle engine running and holds NO power when the ignition is OFF.
- For vehicles fitted with rain sensing wipers; it is recommended to use one of the Fuse-Taps provided to replace the fuse and connect this ignition wire.
- For all other vehicles, an ignition activated source can be located either within the loom to the windscreen wiper motor, or by tapping into the back of a socket (such as a cigarette socket).
- Connect the Anderson 1mt connecting lead to the Anderson rear box and to the Thumper.
- Final Step - Testing the charging system
- Start the vehicle engine and increase the vehicle's RPM to approx 1500-2000 for 3 - 5 seconds. At this stage, allow for your vehicle to idle whilst checking the Thumper voltage. The voltage should start to increase on the Thumper display. --> If the voltage increases at this point, then you have successfully installed the charging system.
NOTES FOR RELAY MOUNT:
- The aluminum bracket on the Relay Mount must be mounted to the vehicle’s body. Mounting to the body will provide an earth connection to the relay.
* If the relay mount is fastened to a plastic surface or to a fibreglass body, then an additional earth wire must be connected to the aluminum bracket via one of the mount holes provided.
The Relay Mount is equipped with two optional pre-drilled mount holes. Either hole may be used to fasten the Relay Mount; alternatively, the top foot may be removed, or straightened, to allow for mounting to the rear firewall or side guard of the vehicle.
NOTES FOR IGNITION WIRE:
The Relay Mount has been fitted with an ignition wire. This wire must be fitted to any positive connection that is ONLY live when the vehicle’s ignition is ON. The power feed must hold NO power when the
vehicle’s ignition is OFF.
For vehicles fitted with rain sensing wipers; it is recommended to use one of the Fuse-Taps provided to replace the fuse and connect this ignition wire.
For all other vehicles, the most common ignition source can be found within the windscreen wiper motor loom.
Payment & Security
Your payment information is processed securely. We do not store credit card details nor have access to your credit card information.